

Four-Lamp Softbox Lighting for Clean Product & Portraits

Photo Studio Four Lamp Softbox: Even Light for Clean Product and Portrait Photos
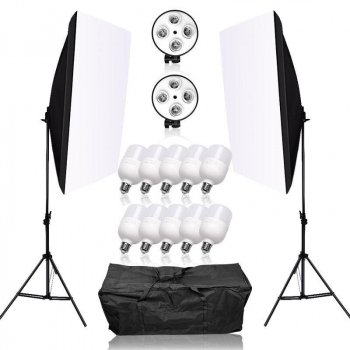
A four-lamp softbox setup is built to deliver bright, diffused illumination with smoother shadows and more consistent results across product shots, portraits, and small set work. With multiple lamps inside a single modifier (or a coordinated kit), it’s easier to keep exposure stable, shape reflections, and repeat a look across dozens—or hundreds—of images.
What a four-lamp softbox setup is designed to do
The main advantage is broad, softened light that reduces harsh shadow edges and specular hotspots on skin, packaging, and reflective surfaces. By combining multiple lamps, total output increases, which helps you shoot at lower ISO and more comfortable shutter speeds (within your camera’s sync limits if you’re mixing with flash).
It also supports repeatability. Once you’ve found good positions and distances, you can tape-mark stand locations and keep results consistent across batches of product photos. For continuous-light shooting, it’s especially learning-friendly because you can see lighting changes in real time while you adjust angles, diffusion, and distance.
Best results come from controlling spill. Distance, feathering (aiming the softbox slightly past the subject), flags/black foam board, and subject-to-background separation all help keep contrast clean and backgrounds predictable. If you want a quick refresher on lighting fundamentals, Nikon’s overview is a solid starting point: Photography lighting basics — Nikon Learn & Explore.
Common four-light layouts and what they’re best for
| Layout | Light positions | Best for | Quick tip |
|---|---|---|---|
| Classic product setup | Key + Fill in front, Back/Rim, Background light | E-commerce products, catalogs | Keep the background light aimed at the backdrop, not the subject, to avoid haze |
| Portrait soft + separation | Key 45° front, Fill near camera axis, Hair/Rim behind, Background light | Headshots, lifestyle portraits | Raise rim light above head level to avoid flare in the lens |
| Flat-lay overhead | Two lights left/right high, two as fill/bounce or background | Top-down flat-lays, food, crafts | Use diffusion and equal distances to minimize falloff across the frame |
| Reflective object control | Key large and close, Fill from opposite side, Two lights for backdrop/edge control | Glass, glossy packaging, metal | Move lights relative to reflection angles; small moves make big changes |
Key components that affect results
Softbox size and diffusion
A larger apparent light source (big modifier close to the subject) creates softer transitions between highlight and shadow. If your kit supports double diffusion, it can smooth highlights further—useful on shiny labels, glassware, and oily skin. The tradeoff is reduced output, so you may need to move the light closer or increase lamp power.
Lamp type, output, and heat limits
Brightness determines how comfortably you can shoot at your preferred aperture and ISO. Match lamps to the fixture’s ratings, and respect heat limits—especially in enclosed softboxes where warmth can build up. If you notice the diffusion getting hot to the touch, back off the output, add ventilation time, or increase distance.
Color temperature consistency
Mixing different lamp types can cause uneven color across a product line. Keeping lamps matched helps; setting a custom white balance or using a gray card at the start of each session can keep edits consistent. For deeper background on how “warm” and “cool” lighting is measured, see: Color temperature — Encyclopaedia Britannica.
Stands, mounts, and stability
Stable stands reduce tip risk and keep light placement repeatable. Tighten knobs, confirm the softbox mount is fully seated, and add sandbags when the modifier is extended or raised high.
Distance and falloff
Moving a softbox closer increases softness and brightness, but it also increases falloff (the background gets darker faster as it’s farther from the light). This behavior is described by the inverse-square law: Inverse-square law (light falloff) — Britannica. In practice, a small distance change can noticeably shift background tone.
Simple placements that work for most shoots
Start with a key light about 45° to the subject and slightly above eye level (for portraits) or above product level (for tabletop). Angle it down gently to add shape without deepening shadows too much. Then add fill near the camera axis to open shadows while keeping depth—either reduce fill intensity or move it farther away so it doesn’t flatten everything.
Workflow for consistent, repeatable images
Safety, space, and maintenance
When this setup is the right fit
In-stock picks
If you’re building a flexible, repeatable lighting workflow, the Photo Studio Four Lamp Softbox is designed for bright, diffused output and straightforward placement for product and portrait sessions.
For portrait prep and consistent on-set grooming checks, a dedicated, evenly lit mirror can help maintain continuity between shots; the LED-Lit Round Frameless Smart Bathroom Mirror – Anti-Fog, 3-Color Lighting, Wall Mounted adds adjustable lighting that’s useful in a home studio environment.
FAQ
How far should a softbox be from the subject?
A practical starting range is about 2–5 feet, depending on subject size and how wide you need the coverage. Move it closer for softer light and more brightness, then back it off until the light is even across the subject and the background tone is where you want it.
How can glare be reduced on glossy products?
Change the light-to-camera angle and feather the softbox so the brightest part isn’t aimed straight at the product. Increasing diffusion and the apparent size of the source helps, and black/white cards can shape reflections; polarization can also be effective when the surface and angles allow.
Is a four-lamp softbox better than two lights for product photos?
Not always “better,” but usually more flexible: separate control for key, fill, rim, and background can speed up repeatable results. Two lights can still work well with reflectors, but it often requires more repositioning between products and angles.


Leave a comment